Grocery Organization
My plan is to print this template out each week, take 30 minutes or so to fill it out. That way I can get everything I need for the week in one trip. I have check boxes next to the items so instead of having to write each item each time I need to buy it, I can just check the box (saving time). There is also space next to each item so I can add details (maybe quantity, brand, etc).
We'll see how it goes, but I wanted to upload the template in case anyone else could benefit from this system. I've included a pdf of the document as well as the original (made in Word Publisher) in case anyone wanted to personalize the template.
Enjoy!
 |
| Preview of the template |
Dream Sewing Room
As many of you know, my husband and I just bought our "forever house." While the house is spacious and we have a comfortable amount of land and my husband has a 50x60 ft shop in the backyard, the best part about the property is the detached 4-car garage with a mother-in-law suite above it which I've converted into my sewing room.
Here are some before pictures. The previous owners rented this space out to some "interesting people" ...there was a lot of work to make the space usable again!
The garage... stairs leading to the sewing space.
Not sure what the plywood is doing on top of the water heater container thing... and don't you love the blue paint along with the blue tape? Like I said, "interesting people."
We've ripped all of this out.
This closet backs up to the stairs.
While my allergies have never gotten along with carpet, these people were heavy smokers, so this carpet had to go ASAP.
Now that we had everything ripped out, I spent about 2 weeks painting! I felt like I was never going to be done. All of the wood (except for the wall with the window) is bead board -- which has to be painted with a paint brush and that's why it took me 2 weeks to paint this room. Plus I had to put kilz on everything because of the smoking.
Then I painted the plywood with porch/deck paint. We'll put hardwood floors in here one day, but for now, that is a good, cheap solution.
Once the painting was done, the hubby and I started the frame work for the furniture.
This is Charley's new framing nailer -- all of this sewing furniture gave him the excuse to get one.
First time using our router table that my Paulk cousins gave us for our wedding. It takes some getting used to (the bit spins at 25,000 rpm) but once you get the hang of it, things go pretty fast.
My parents came over that weekend to help with things.
I am too afraid of the framing nailer to use it, but I can definitely use a brad gun.
Still a long way to go, but I'm able to sew again. :-)
Replacing carpet with REAL Oak Wood Floors
My husband and I are BIG do-it-yourself-ers.
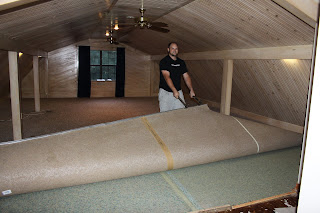
We ripped out the carpet that was upstairs in our rental house last year and replaced it with oak floors. Yes, real wood - not the engineering wanna-be-wood. We've done the engineering stuff as well but if you have any critters, forget about it! This stuff won't hold up. Plus we are wood snobs and like the fact that the floors are real.
The upstairs of our rental house has a family room and an extra bedroom. Since these were casual rooms (and we were on a budget), we decided to go with the utility grade oak from Lumber Liquidators and couldn't have been any happier! The only suggestion is to order the 3.25" wide planks instead of the 2.25" since the job will be done faster.
 |
| Bundles of approximately 700 sq ft of wood |
 |
| Helpers ;-) |
In order to lay the floors, you'll need a compressor and a floor nailer. We got ours from Harbor Freight and it works alright. Not the best on the market, but unless you're doing this for a living, you probably won't see the benefit relative to cost.
Also, we have a compact miter saw that came in handy during this project! I love using that saw - it is very easy to use and not at all intimating.
The process works best with two people. One person should be the floor nailer while the other person sorts through the wood, puts good pieces in place, and cuts the last piece to fit against the wall.
After that process is repeated a few times... you get something like this..
Since this was utility grade, there were some dings and knots in the wood. I filled those in with wood filler.
Then we had to sand the wood and apply three costs of poly. You can stain the wood if you wish, but we didn't since 1) we didn't have the time and 2) we like the look of natural wood.


